Search Results for: plum slate
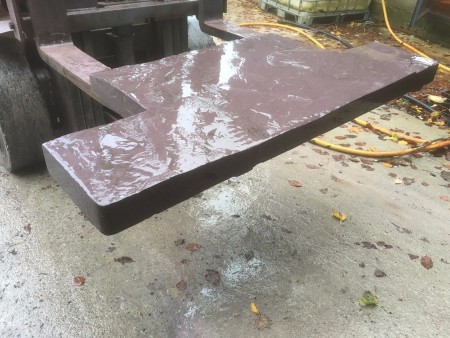
Here’s a little example of some of our recent bespoke work! Its not all about whats in our online shop! This slate hearth stone was created by us last month from a large block of slate we had at the request of a customer who wanted something a little extraordinary. Splitting the slate to give a beautifully riven top and then cutting, rounding and polishing the edges resulting in a completely unique welsh slate hearth for our customer.
If you are interested in having something a little bit different in your home, then please get in touch, we love working on special projects and bringing ideas to life!
Decorative aggregates
Comments Off on Decorative aggregates
Working out the quantity needed when ordering decorative aggregates can be a little tricky. Too shallow and your not going to get that beautiful covering of coloured aggregate your after. Where as if you get it too deep and your going to be sinking in your driveway like at a pebble beach. So in order to give you a helping hand we are going to explain the ways in which we would calculate the depth of your pebbles and decorative aggregates.
The aggregate depth required does vary depending on the aggregate shape. “Decorative aggregates” is the term used for aggregates that are selected to look attractive. So within the decorative aggregates category on our website you will find all different types of aggregate. These include, metamorphic, igneous and sedimentary stones. When these materials are processed due to their different properties they break up in different ways. Most decorative aggregates are what we describe as “angular shape”. This is like a miniature boulder shape, being roughly spherical. However there are exceptions. The main one being slate aggregates. Slate generally breaks into flat and slim pieces.
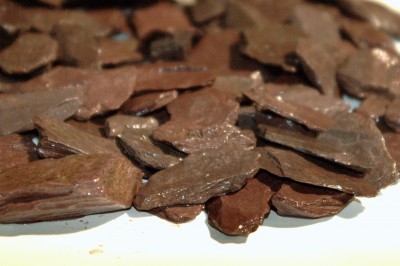
Plum slate 40mm
Starting with our angular shaped decorative aggregates. Wadsworth Design generally supplies decorative aggregates in 14mm or 20mm. At Wadsworth Design we generally follow two rules. One for the smaller sizes 10mm and under, and one for the larger sized decorative aggregates; 14mm and upwards . For the smaller sizes in theory for a 10mm aggregate we would only need only a depth of around 15mm to put a complete visual covering over an area. However in practice the smaller decorative aggregates move around more under foot and when being driven on. So we would recommend a depth of about 3 times the decorative aggregate size to compensate for this movement. This means a depth of 30mm is required when using a 10mm decorative aggregate and a depth of 18mm for a 6mm decorative aggregate.
As a coverage we wouldn’t recommend going much deeper than this especially if the decorative aggregate of choice is a rounded gravel, eg. Our rounded pea gravel. This is because the rounded gravels don’t lock together as well as the angular aggregates. This results in the pea gravels moving around more. If you get these too deep it can result in your drive or garden pathway having a “pebble beach effect”, where you sink into the gravel and it gets in your shoes and all over.
If you require to increase the height of your drive then it should be done with larger aggregates first. Rather than using decorative aggregates. This can be done in layers, for example if you wanted the drive to raise 300mm and its just a low use driveway, the ground is relatively stable already then you could apply a 175mm layer of 40-75mm aggregate, then a 100mm layer of mot type 1 (compacted in two layers (ie 50mm laid then compacted, then another 50mm laid and compacted) and then finish off with the 25mm layer of the 10mm decorative aggregate of choice.
Using a larger aggregate size such as 14mm and above you can get away with slightly less depth. Having a depth twice that of the aggregate size as a minimum would visually cover your area. However we would recommend using 2.5 times the aggregate size for the depth. This compensates for any undulations in the ground. So for a 14mm we would recommend a depth of 35mm
Now moving onto the slate aggregates. These are sized in 20mm or 40mm our most popular size being the 40mm decorative slate. Slate chippings tend to be very flat. Although they might be 40mm in one direction, there depth when laid down will usually be around 5mm. This means for slate coverage the depth needs to be much less. We would recommend a depth of around ¾ the size of the slate aggregate. So if you have a 40mm slate chipping then you would only need a coverage depth of around 30mm.
Obviously the above text refers to a perfect scenario where the area to be covered is level with no pot holes or undulations in the ground which is not always the case. If the area you intend to cover has undulations then you would have to make a decision over how bad the undulations are and whether or not you would need a bit more decorative aggregate than our above recommendations.
How does a monolith work as a water feature?
Comments Off on How does a monolith work as a water feature?
If you purchase one of our slate monoliths as a water feature, then we will have drilled the Stone after cutting the base. We accurately drill to where we believe is the best location for the hole to appear at the top of the stone. Our diameters of the drill hole does vary depending on the stone but most of our monoliths are either 32, 37 or 38mm unless stated or requested differently.
The drill hole at the bottom of the stone will look something like this (the securing bolts are an optional extra and don’t come on standard monoliths}:
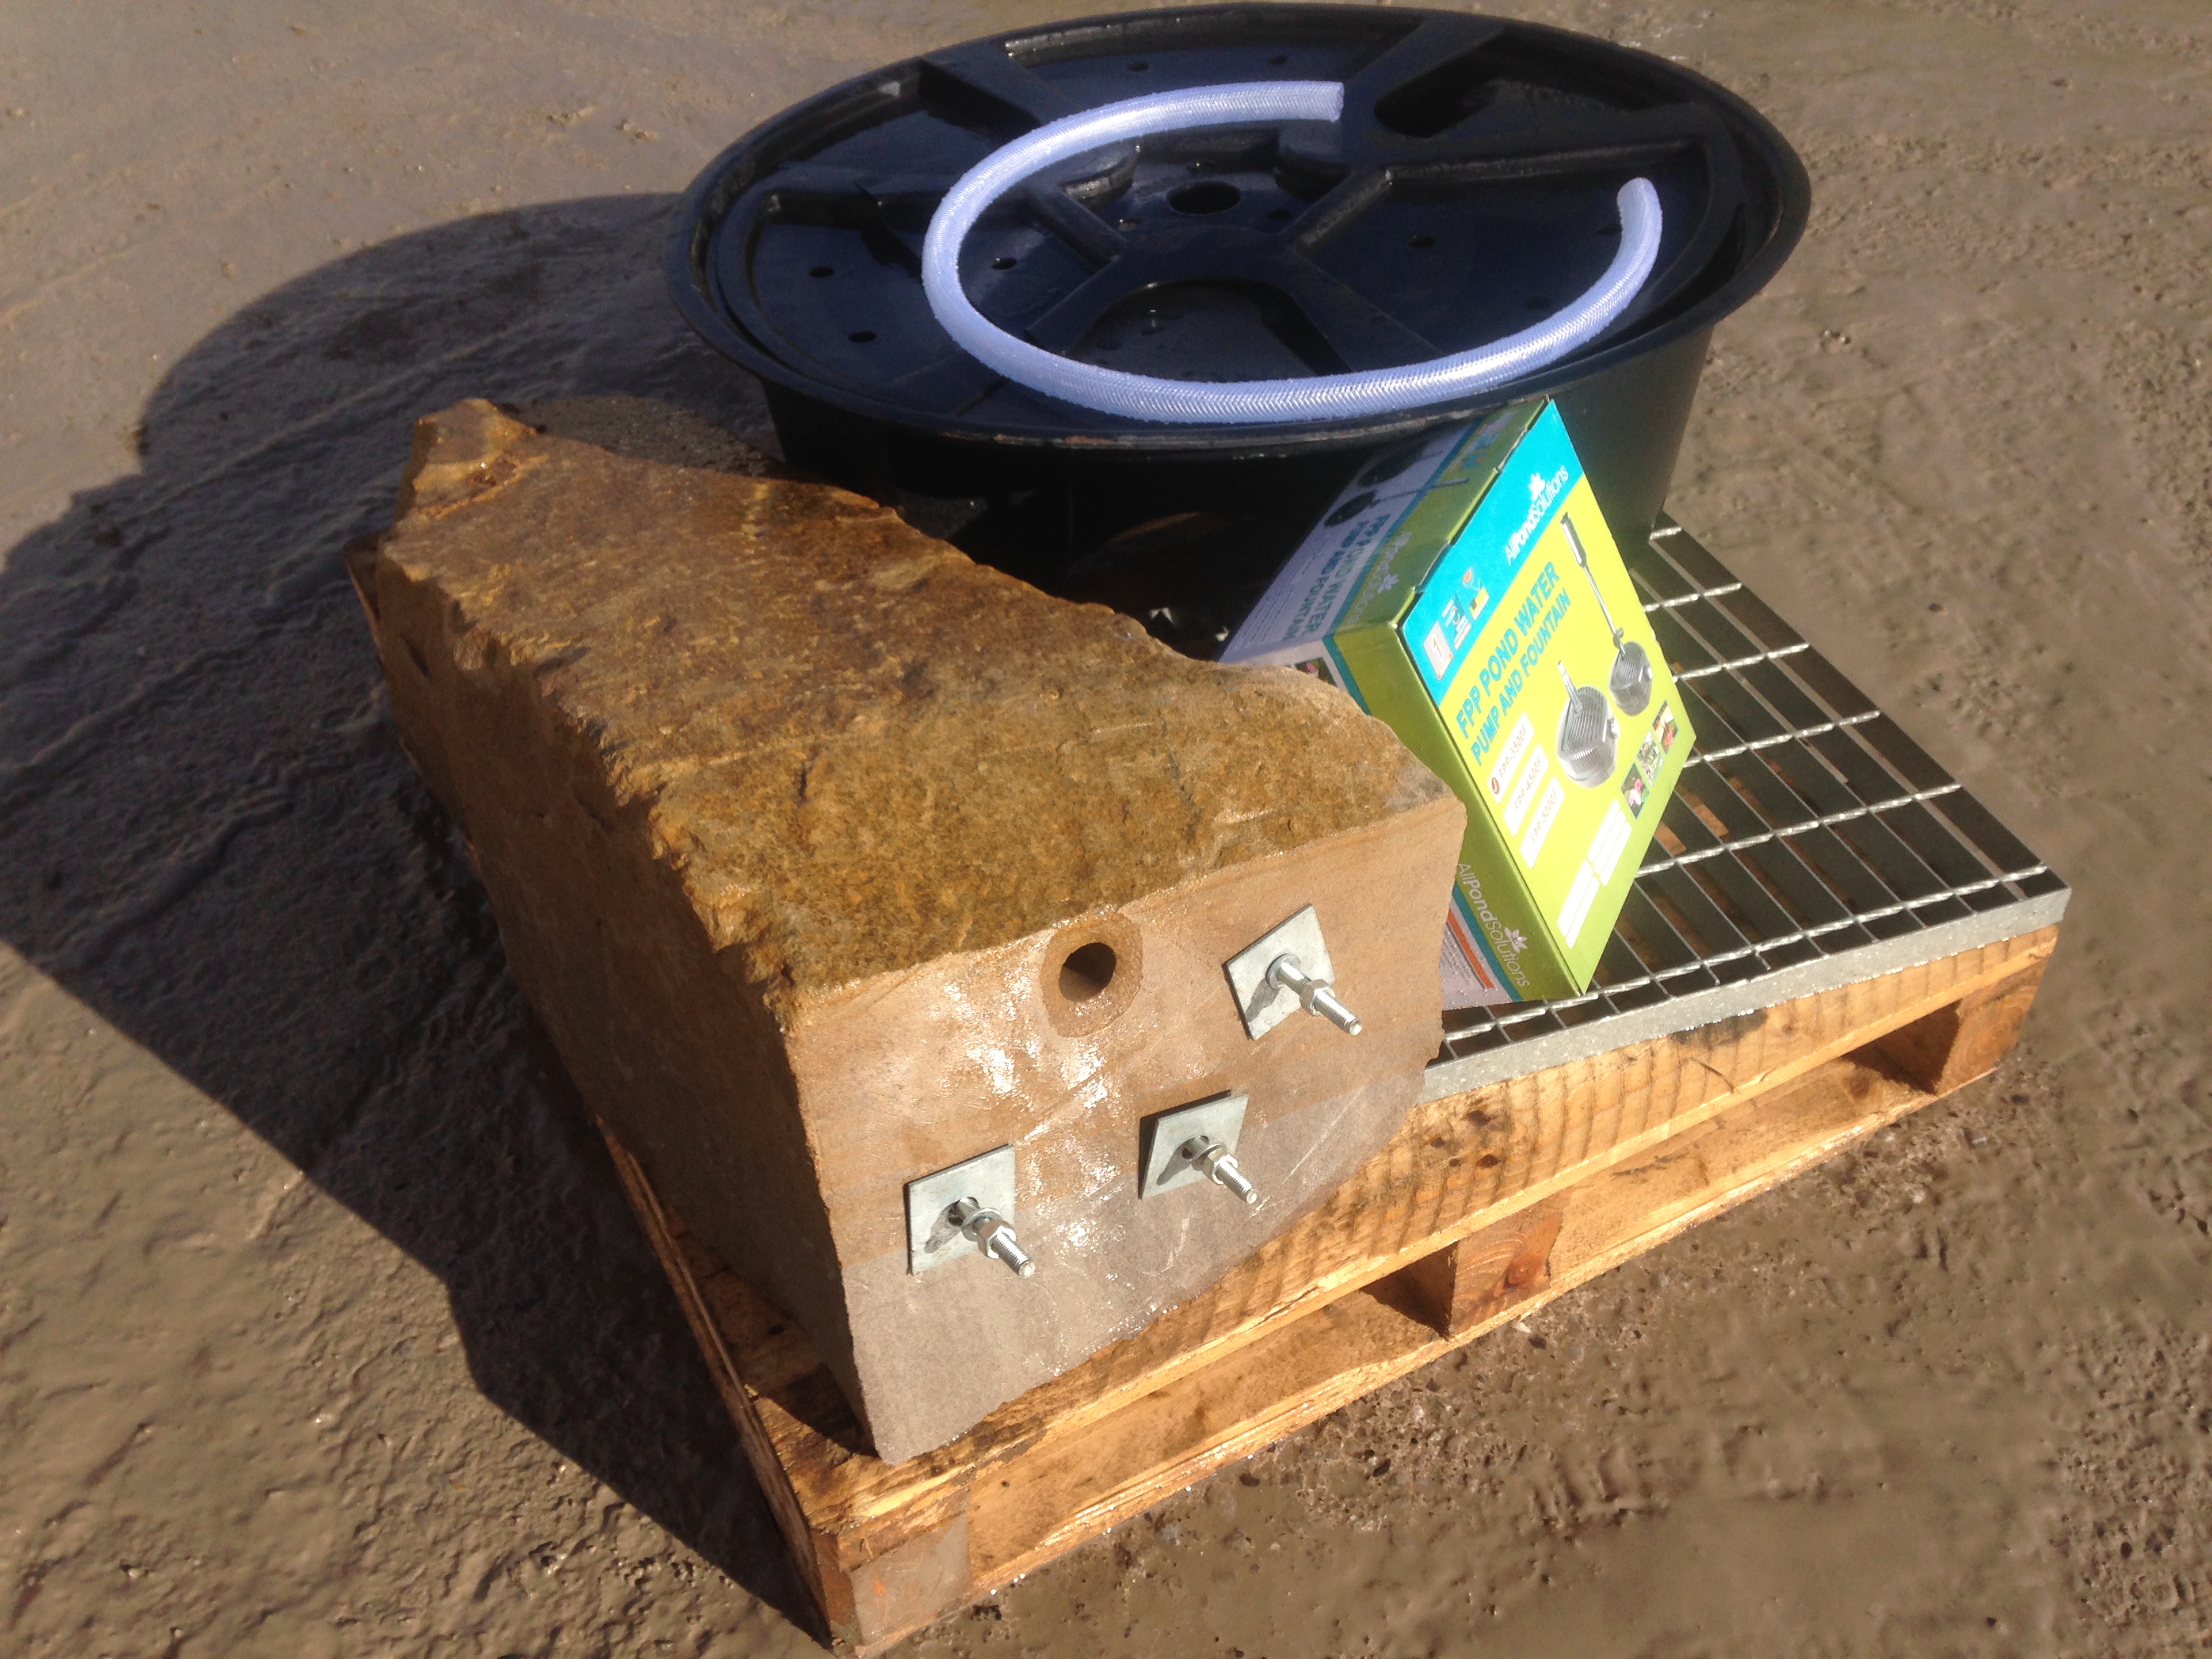
Sandstone Monolith Kit
Most installations are achieved by sitting the stone onto a reservoir which collects the water that has come out of the monolith. A submersible pump ( this is a pump which sits underwater) is used to pump the water out of the reservoir and up the monolith. The water is reused over and over again to give an appearance of a constantly flowing water feature. The reservoir position is shown more clearly below:
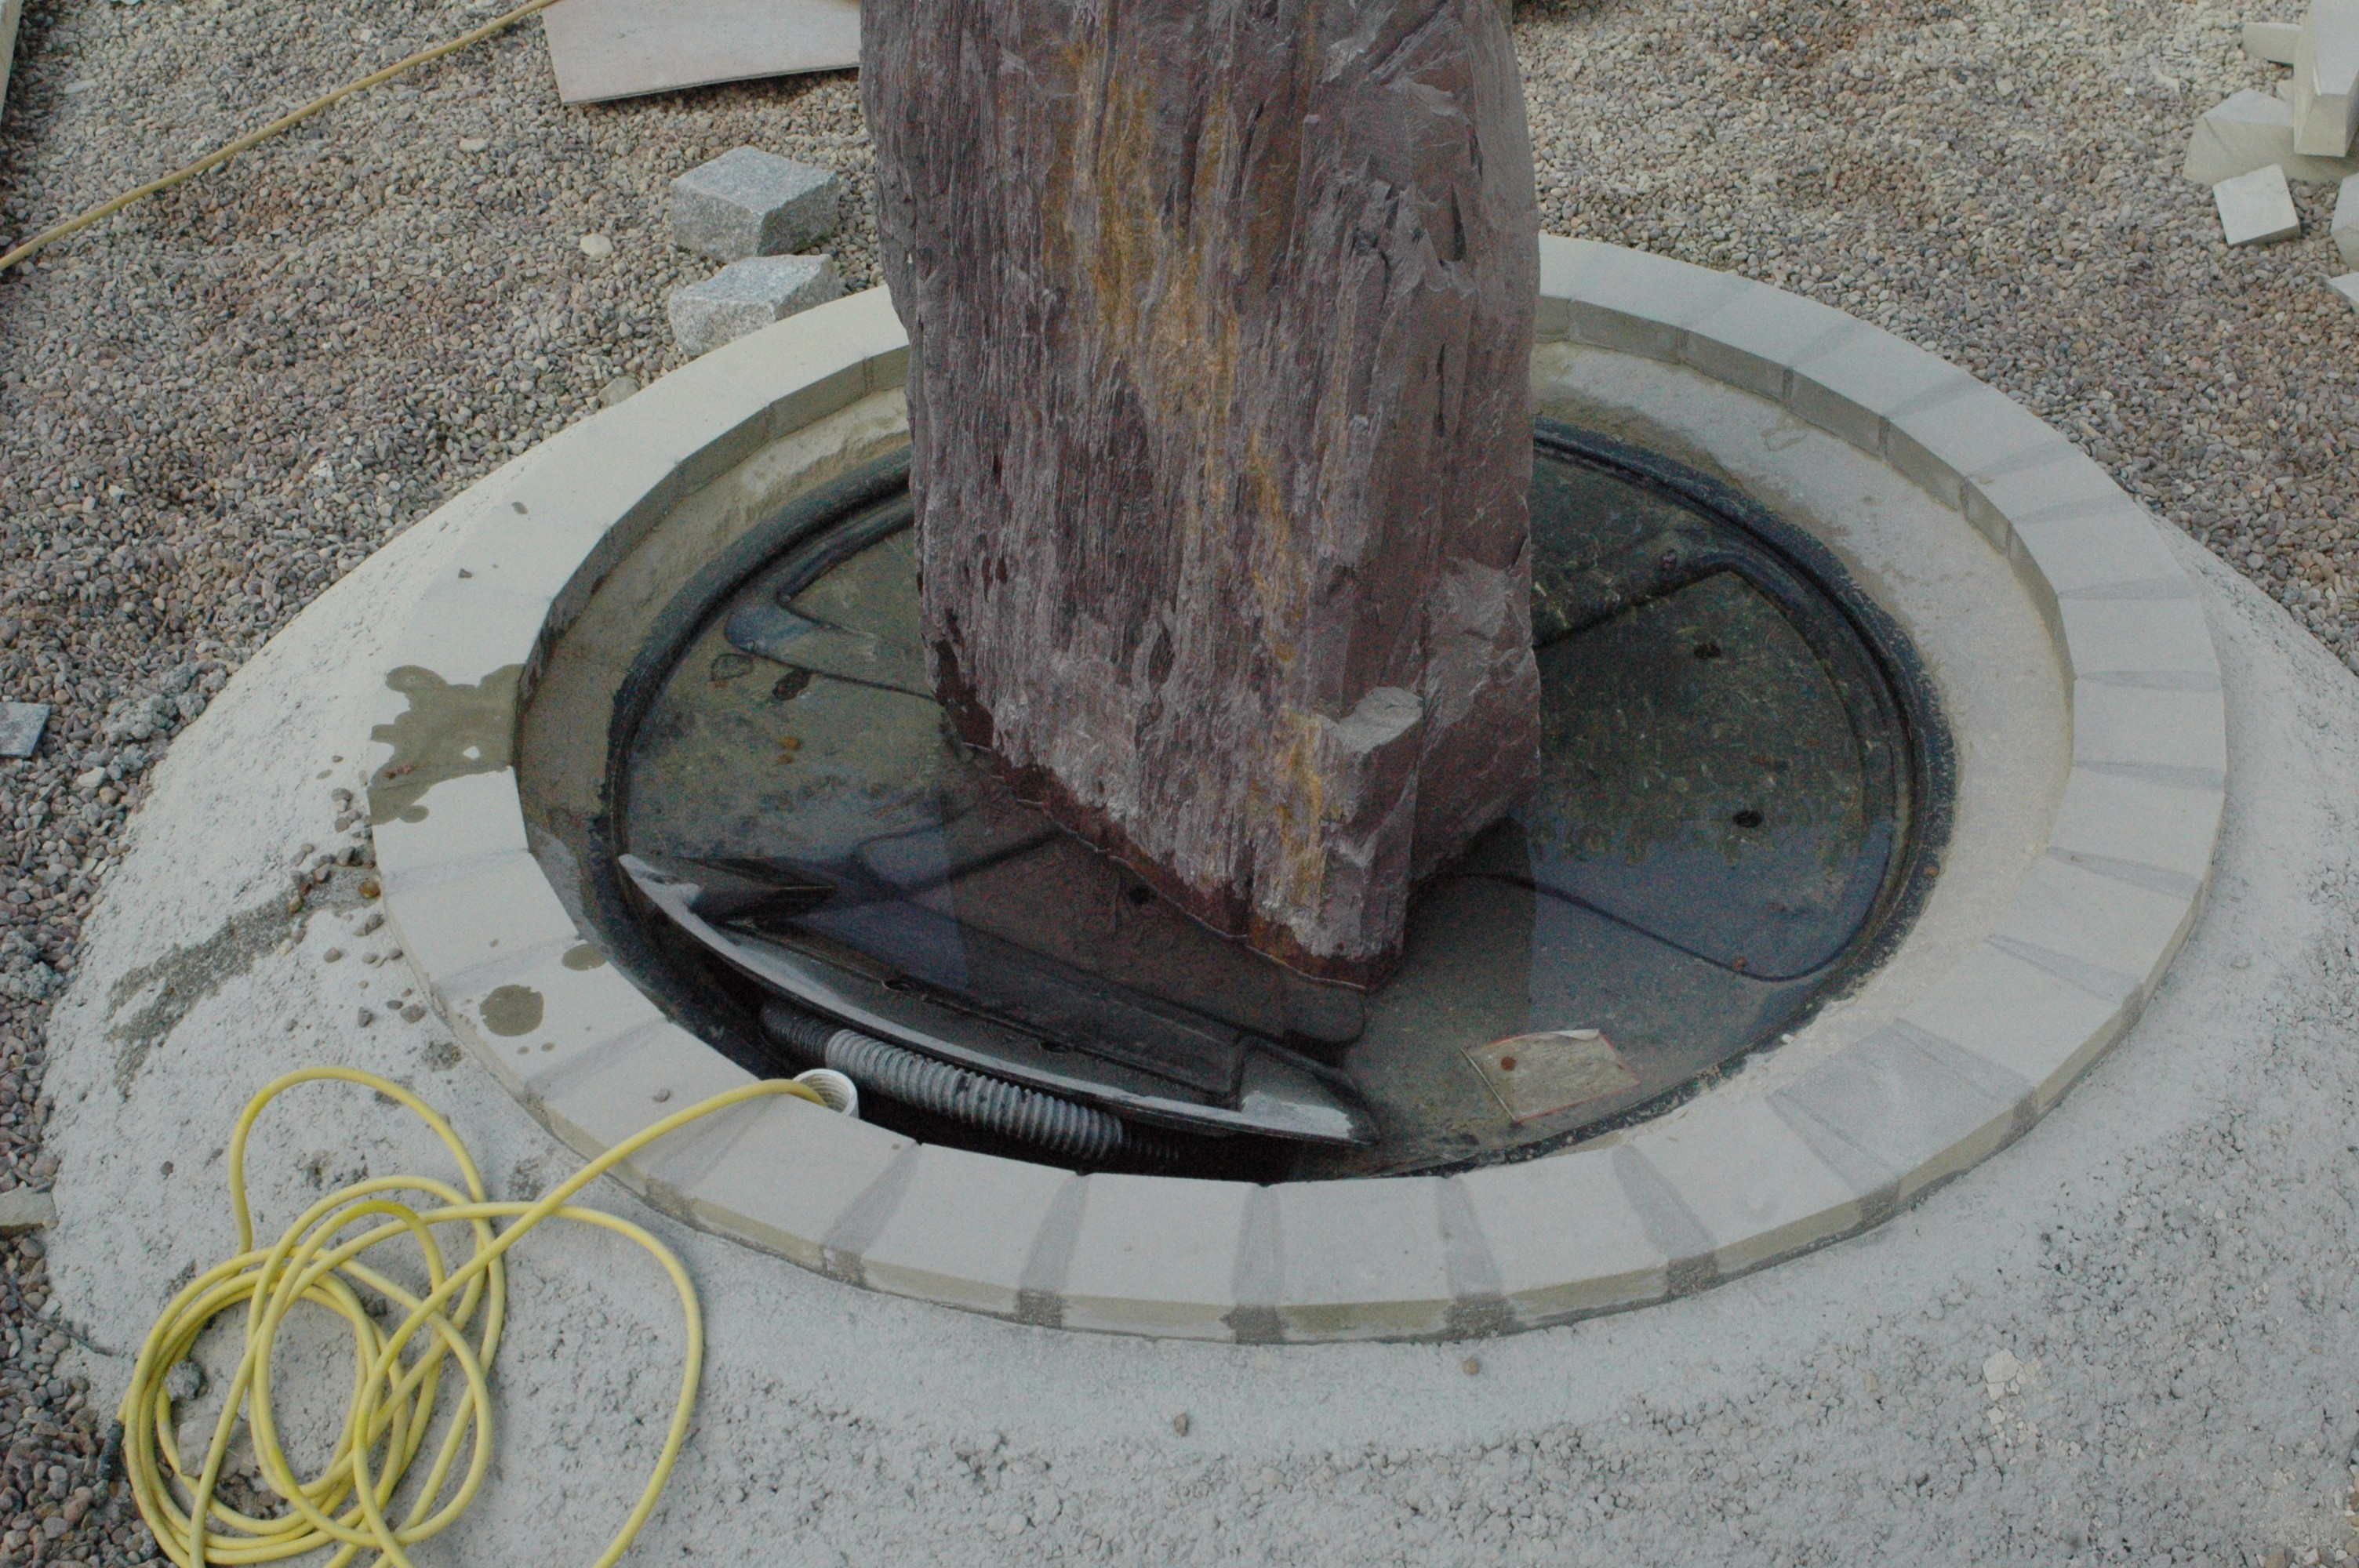
Water feature reservoir
The reservoir is usually sunk into the ground or has a small wall built around it to disguise it and then decorative pebbles used to hide the top of the reservoir as shown below:
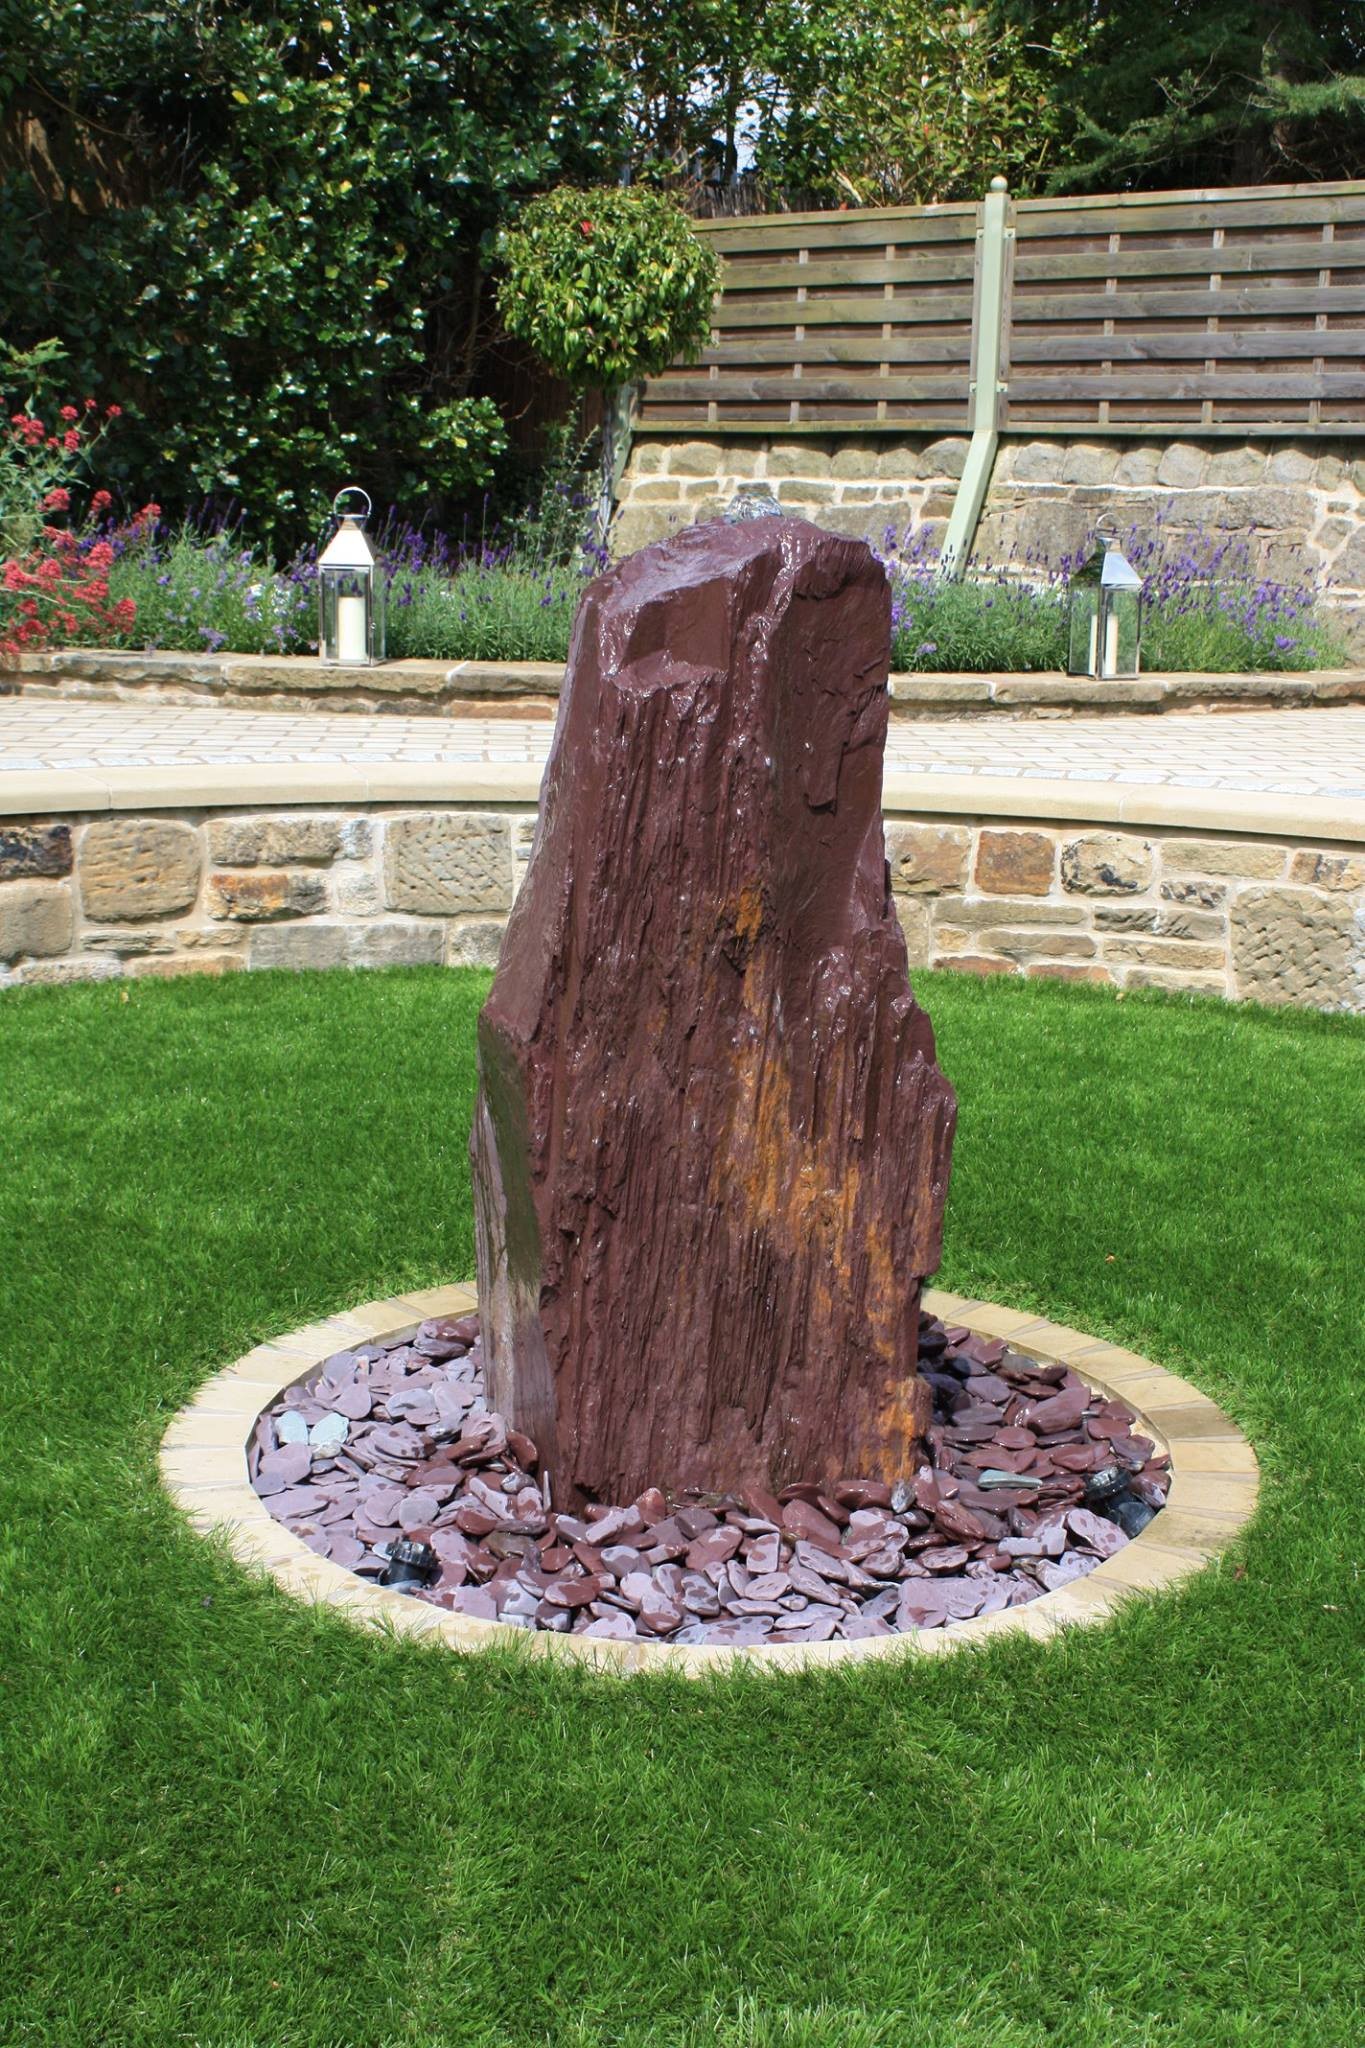
A Plum slate monolith on a reservoir


